Every restaurant owner, manager of a coffeehouse or owner of a grocery store, or manager of a commercial food establishment is aware of the importance of keeping the grease trap cleaned.
Although removing the mess of oils, fats as well as the grease (FOG) is not a pleasant job, it has to be completed frequently. The process of cleaning the grease traps is easy and only requires average physical endurance for the couple of minutes needed to complete the task.
To begin, arm yourself with the proper equipment
- Rubber gloves are designed to safeguard your hands
- Nase plug or gas mask for protection against offensive scents
- Protective coveralls to stop FOGs from staining your clothing
- Crowbar and wrench to remove the lid of the grease trap
- Scraper- to scrub the tank
- Shop vacuum – to draw out the FOGs
Locate the location of the grease trap
Grease traps are situated on the restaurant’s premises, either indoors or outdoors. Outdoor traps can be identified by their manhole cover or septic tank style. When a grease trap is indoors, it’s in the basement of the restaurant (directly below the kitchen) or under the kitchen sink or beneath an iron flashing on the kitchen’s flooring.
If you’ve found your grease trap identify its size. Observing the capacity of the tank will give you a clearer idea of the best option to either employ a professional to remove the grease trap by yourself. A grease trap that is between 500 and 2500 gallons will require the use of professional equipment and instruction. Smaller grease traps can be cleaned by restaurant employees.
Make use of cold water to let the oils, fats and grease to rise up to the top. It will take ten minutes after the hot water is released from the sink or dishwasher and then cools.
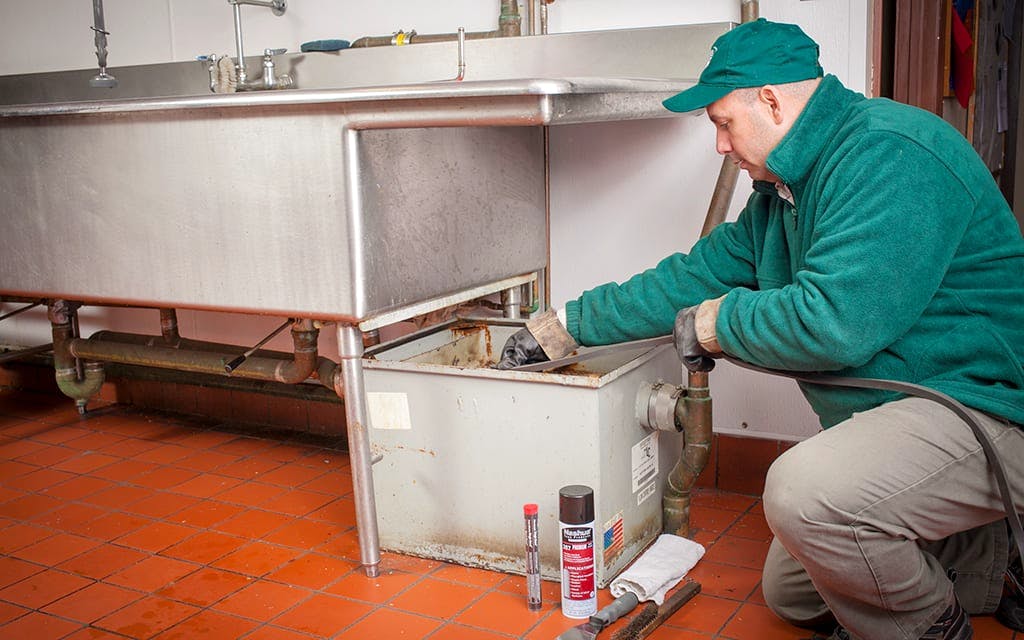
Get access to the infamous fats as well as greases, oils and other greases by carefully removing the cover of the grease tank. A delicate and vital element, called the gasket, could be damaged if attempted to remove the tank cover without care.
The crowbar can be useful at this point, but only if the cover for the grease trap is secured with bolts. It’s easier when your grease trap is fitted with a molded plastic lid that easily snaps off.
Then you’ll find yourself with an inch thick layer of grease-sludge. Get rid of any floating FOGs using a scoop. After the oils, fats and greases have been removed from the tank, only water and food solids leftover from the process remain.
A powerful shop vacuum is helpful in getting rid of the remaining solids and liquids. Make sure that the dishwasher is shut off and that the sinks aren’t being used to stop your grease tank from constantly getting full while you’re working.
The most important job is done at the point of completion. The next step is to remove the trap’s baffles, sides , and lid. Utilising the shop vacuum and suction all solidified fat particles that could be buried in the recesses within the trap. To ensure a thorough clean make use of an industrial vacuum cleaner to pull away any FOGs remaining in this grease trap.
Then, you can refresh the grease trap , and then clean the tank of smells by using a few elbow grease, steel scrubber, dish soap, and tepid water. Then, thoroughly scrub the baffles on the grease trap’s sides, and the lid.
Clean the soap and other debris at least a couple of times using clean water. You’ll have one sparkling grease trap you’ll need to clean every 4 to 6 weeks.
Once the most demanding portion of the job is completed, test your handy work. It is important to ensure that the grease trap is free of any trace of FOGs and blockages do not stop water from draining. From your kitchen’s sink empty a gallon of clean water.
The grease trap should permit water to flow through without obstruction. If you notice a blockage, consult an experienced plumber to clear the issue. Install the various parts in the trap including the lid and baffle.
Properly dispose of the fats oil as well as greases in garbage bags that are double-lined or at the local dumpster if the amount of FOGs is low. An effective method is mixing FOGs that have been removed from shop vacuums with litter to make the grease particles more solid. The large quantities in grease trap sludge need to be cleaned out through professional grease trap firms.
As previously mentioned the grease traps must be cleaned every four or six weeks, at minimum. Bacteria-based additives, which organically breakdown the waste, could be utilized to reduce the frequency of cleaning. Beware of hot water flushes, or products with only enzymes as they melt the FOGs, causing them to drain and then into sewer lines for municipal use.
The price of the professional Grease Trap Cleaning differs and is determined by the dimensions of the trap. Typically, grease traps will be cleaned professionally between $115 and $1040.

