Electronics may be a frightening proposition, specifically for novices. But with a touch of know-how and the proper gear, you could do all types of simple and fun projects. In this newsletter, we’ll walk you through some easy DIY electronics initiatives that you could make with basic substances.
Projects
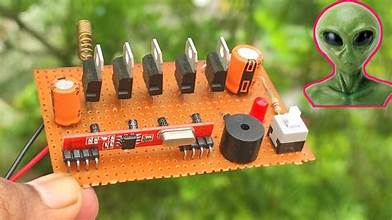
Here are a few simple DIY electronics projects that you can make with basic components
LED Flasher
This is a conventional novice electronics undertaking. An LED flasher is a circuit that causes an LED to show on and off time and again. To make an LED flasher, you may want a breadboard, jumper wires, an LED, a resistor, and a transistor.

LED Flasher circuit
Instruction
- Connect the LED to the breadboard in accordance with the circuit diagram.
- Connect the resistor to the LED and the breadboard in step with the circuit diagram.
- Connect the transistor to the LED, resistor, and breadboard in step with the circuit diagram.
- Connect a 9-volt battery to the breadboard in line with the circuit diagram.
- The LED needs to now begin flashing.
Clap Switch
A clap switch is a circuit that turns on a light or other tool while you clap your palms. To make a clap switch, you may need a breadboard, jumper wires, a microphone, a transistor, and a relay.

Clap Switch circuit
Instructions:
- Connect the microphone to the breadboard in line with the circuit diagram.
- Connect the transistor to the microphone and breadboard in line with the circuit diagram.
- Connect the relay to the transistor and breadboard in keeping with the circuit diagram.
- Connect a 9-volt battery to the breadboard according to the circuit diagram.
- Clap your arms, and the relay needs to turn on.
Automatic Night Lamp
This project is a bit more complicated than the preceding one, but it is nevertheless fantastically clean to make. An automatic nighttime lamp is a circuit that activates a light when it gets dark and turns it off when it gets mild. To make an automatic night lamp, you may need a breadboard, jumper wires, a photoresistor, a transistor, and a relay.

Automatic Night Lamp circuit
Instructions:
- Connect the photoresistor to the breadboard according to the circuit diagram.
- Connect the transistor to the photoresistor and breadboard in step with the circuit diagram.
- Connect the relay to the transistor and breadboard, consistent with the circuit diagram.
- Connect a 9-volt battery to the breadboard in line with the circuit diagram.
- Place the photoresistor in a dark region, and the relay should activate.
Morse Code Translator
This project is a fun and academic way to find out about Morse code. To make a Morse code translator, you’ll need a breadboard, jumper wires, a push-button switch, an LED, and a 9V battery.

Morse Code Translator circuit
Instructions:
- Connect the rush button switch and LED to the breadboard according to the circuit diagram.
- Connect the battery to the breadboard according to the circuit diagram.
- When you press and hold the rush button transfer, the LED will activate.
- When you release the frenzy button transfer, the LED will turn off.
- You can use this to create your personal Morse code messages.
Magic Wand
This project is a simple and amusing way to make your very own magic wand. To make a magic wand, you will need a breadboard, jumper wires, a reed switch, a magnet, an LED, and a 9V battery.

Magic Wand circuit
Instructions:
- Connect the reed transfer, LED, and battery to the breadboard consistent with the circuit diagram.
- Wrap the magnet with electric tape.
- When you deliver the magnet near the reed transfer, the LED will activate.
- When you move the magnet away from the reed transfer, the LED will flip off.
- You can use this to create your personal magic spells!
Touch Switch
This project is an easy and beneficial way to make your own contact switch. To make a hint switch, you may need a breadboard, jumper wires, a copper tape electrode, an LED, and a 9V battery.

\
Touch Switch circuit
Instructions:
- Connect the copper tape electrode to the breadboard, consistent with the circuit diagram.
- Connect the LED and battery to the breadboard in accordance with the circuit diagram.
- When you contact the copper tape electrode, the LED will activate. When you release the copper tape electrode, the LED will flip off.
- You can use this to create your own touch-sensitive switches.
ESP32 Pinout
The ESP32 is a popular microcontroller that can be used to construct a huge variety of electronics initiatives. You should have a look at the ESP32 Pinout.
The ESP32 pinout is the mapping of the physical pins at the ESP32 microcontroller to their capability. The ESP32 has 34 pins, which can be used for a whole lot of purposes, such as GPIO, PWM, I2C, SPI, and ADC.
Solderin
Soldering is a system of joining two steel surfaces by means of melting a solder alloy between them. Solder is a metal alloy with a melting factor that is lower than the melting factors of the metals being joined. When the solder is melted, it flows into the distance between the two metals and forms a strong bond.
Breakout Boards
Breakout boards are small circuit boards that make it easy to connect ESP32 modules to other components, such as sensors, actuators, and displays. There are many different types of breakout boards available, each of which provides access to a different set of ESP32 pins.
Conclusion
These are just a few examples of simple DIY electronic projects that you can create with basic materials. With a little knowledge and practice, you can do all kinds of interesting and useful projects. So start today and learn about the world of electronics!