You’ve hiked three miles uphill to catch the golden hour over a mountain ridge, only to realize your hands are too shaky from the climb to capture a clean long-exposure shot. It’s a frustrating moment every hiking photographer knows well — and it’s exactly why a reliable lightweight tripod belongs in your pack. But here’s the challenge: most tripods that offer rock-solid stability weigh enough to make you regret bringing them by mile two. The best lightweight tripod for hiking enthusiasts strikes a careful balance between portability and performance, giving you the support you need without dragging you down on the trail.
This guide is designed to help outdoor enthusiasts navigate the crowded tripod market with confidence. We’ll break down the essential features that matter most for trail use, review standout models including the TT35 tripod, and compare options like mini tripods, monopods, and quick-release systems. Beyond gear selection, you’ll also find practical tips for using and maintaining your tripod in rugged conditions. Whether you’re a weekend day-hiker or a backcountry trekker chasing remote landscapes, the right tripod can transform your outdoor photography.
Essential Criteria for the Best Lightweight Hiking Tripod
Not every tripod that works well in a studio will survive a day on the trail, and not every ultralight option will hold your camera steady when it counts. The best lightweight tripod for hiking needs to satisfy a specific set of demands that studio or travel tripods simply aren’t built for. Understanding these criteria before you shop will save you from buyer’s remorse — and from hauling dead weight up a mountain.
Weight and portability sit at the top of the list. For most hikers, a tripod weighing between one and three pounds hits the sweet spot. Carbon fiber models tend to shave significant ounces compared to aluminum alternatives, and a folded length under 18 inches means the tripod can strap neatly to the side of a daypack or slide into a hydration sleeve. Every ounce matters when you’re covering serious elevation, so look for designs that collapse compactly without sacrificing extended height.
Stability on uneven terrain is equally critical. Independently adjustable legs with multiple angle settings let you plant the tripod on rocky slopes, rooted trails, or stream banks where flat ground doesn’t exist. Spiked or rubberized feet — ideally interchangeable — grip surfaces that would send a standard tripod sliding. A low center hook or removable center column allows you to get the tripod close to the ground for macro shots or windy conditions.
Quick setup mechanisms make the difference between catching a fleeting moment and missing it entirely. Twist-lock leg sections deploy faster than flip locks for many users, though both have their advocates. A quick-release plate system lets you snap your camera on and off in seconds, which is essential when you’re alternating between handheld and tripod shooting throughout a hike. Finally, adaptability matters — your tripod should handle everything from a compact mirrorless body to a mid-range DSLR with a standard zoom, giving you flexibility as your kit evolves.
Top Contenders: Reviewing Lightweight Tripods Including the TT35
With so many options on the market, narrowing down the right hiking tripod can feel overwhelming. The models that consistently earn praise from trail photographers share a few common threads: they weigh under three pounds, fold compact enough to strap onto a pack, and deliver dependable stability when conditions get rough. Here’s a closer look at some of the strongest options available, evaluated against the criteria that matter most on the trail.
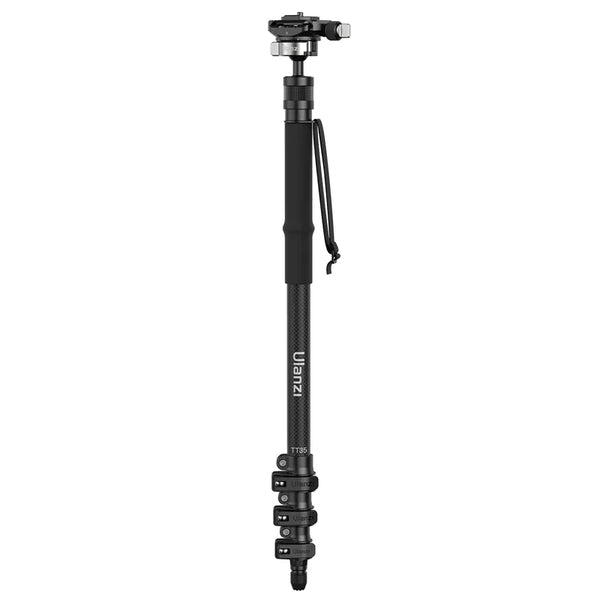
In-Depth Look at the TT35 Tripod
The TT35 tripod has earned a loyal following among hiking photographers for good reason. Its carbon fiber construction keeps the weight impressively low without compromising rigidity, and its folded profile tucks easily against a daypack. The leg sections deploy quickly with smooth twist locks, and independently adjustable leg angles let you stabilize on uneven rock or sloped ground in seconds. A built-in quick-release plate means you’re not fumbling with mounting hardware when the light is changing fast. On the downside, its maximum height may feel limiting for taller photographers, and the thinner leg diameter can transmit vibrations in strong wind if you don’t use the center column hook to hang ballast. Overall, the TT35 addresses the core hiking demands — light carry weight, fast setup, and reliable terrain adaptability — making it a compelling choice for anyone who refuses to compromise image quality on the trail.
Other Notable Models: Mini Tripods and Monopods
Beyond full-size tripods, mini tripods and monopods deserve consideration depending on your shooting style. Tabletop-style mini tripods weigh just ounces and can perch on boulders, fallen logs, or ledges to provide surprisingly stable platforms for compact mirrorless cameras. They’re ideal for ultralight backpackers who count every gram. Brands like Ulanzi offer compact mini tripod options that pair well with lightweight mirrorless setups for trail use. Monopods, meanwhile, offer a different trade-off: they eliminate most camera shake while adding minimal weight and virtually no bulk. A monopod won’t replace a tripod for long exposures, but for telephoto wildlife shots or steady video on the move, it’s a versatile companion. Some models even convert between monopod and trekking pole, pulling double duty on the trail.
Choosing Between Mini Tripod, Monopod, and Quick-Release Systems
Selecting the right support system comes down to how you actually shoot on the trail. A mini tripod, a monopod, and a full tripod with a quick-release system each solve different problems, and understanding those differences prevents you from carrying gear that doesn’t match your needs.
Mini tripods excel when weight savings are the absolute priority. If you’re shooting with a compact mirrorless camera and primarily need stability for self-portraits, time-lapses from a fixed vantage point, or short exposures from natural surfaces like rocks and logs, a mini tripod handles those tasks at a fraction of the weight. However, they limit your shooting height and struggle on soft ground where there’s nothing solid to rest on. They’re best suited for ultralight hikers on well-traveled trails with abundant natural platforms.
Monopods make sense when you need mobility more than locked-down stability. Wildlife photographers who track moving subjects through telephoto lenses benefit from the reduced shake a monopod provides without the time cost of setting up three legs. They also double as walking aids on steep terrain. The trade-off is clear: you cannot achieve true long-exposure sharpness with a monopod alone, so they complement rather than replace a tripod.
A full lightweight tripod equipped with a quick-release plate system offers the most versatility. Quick-release mechanisms let you transition between handheld and mounted shooting in seconds, which matters when conditions shift rapidly on a hike. If your camera body and lens combination exceeds two pounds, or if you regularly shoot exposures longer than a quarter second, this setup is the most dependable choice. Consider the terrain you frequent, the weight of your camera kit, and how fast you need to be ready — those three factors will point you toward the right option every time.
Practical Guide: How to Use Your Tripod Effectively on Hikes
Getting the most from your lightweight tripod on the trail requires a few deliberate habits that go beyond simply extending the legs and mounting your camera. Start with how you carry it: strap the tripod vertically along the side of your pack using compression straps or a dedicated tripod holder, keeping the weight close to your back’s center of gravity. Avoid dangling it loosely from a carabiner, which creates sway and throws off your balance on technical terrain.
When you reach a shooting location, deploy the tripod legs to their widest stable angle before adjusting height. On rocky or uneven ground, adjust each leg independently so the platform sits level rather than relying on the ball head to compensate — tilting the head too far reduces its effective load capacity. Press down firmly on the tripod after setup to seat the feet into soft dirt or gravel. In windy conditions, hang your pack from the center column hook to add ballast, lowering the center of gravity without carrying extra weight specifically for that purpose. Keep your quick-release plate attached to your camera throughout the hike so mounting takes seconds, not minutes. For long exposures, use a two-second shutter delay or a remote trigger to avoid introducing vibration when pressing the shutter button. These small adjustments compound into noticeably sharper images and a smoother workflow, letting you spend more time enjoying the trail and less time wrestling with your gear.
Maintaining Your Tripod for Longevity on the Trail
A lightweight hiking tripod represents a real investment, and trail conditions — dirt, sand, moisture, and temperature swings — will degrade it faster than casual indoor use ever could. Building a simple maintenance routine after each outing keeps your tripod performing reliably for years. Start by wiping down all leg sections with a damp cloth after every hike, paying close attention to the twist-lock or flip-lock mechanisms where fine grit accumulates. Sand and dirt trapped inside leg joints accelerate wear on locking surfaces and can eventually cause slippage under load. Every few trips, fully extend each leg section, separate them if your model allows it, and clean the interior tubes with a soft brush. Dry all components thoroughly before collapsing and storing the tripod to prevent corrosion on metal parts or moisture damage to carbon fiber resin. Check your quick-release plate and clamp regularly — make sure the plate seats firmly and the locking mechanism clicks without hesitation, since a worn release system risks dropping your camera at the worst possible moment. Lubricate any moving joints or threads with a manufacturer-recommended dry lubricant sparingly; avoid silicone sprays that attract dust. Store your tripod in a cool, dry place with the legs slightly loosened rather than fully clamped, which reduces long-term stress on the lock seals. These small habits take minutes but prevent the kind of field failures that ruin a shoot miles from the trailhead.
Matching the Right Tripod to Your Trail Photography Needs
Finding the best lightweight tripod for hiking means prioritizing a handful of non-negotiable features: a carry weight that won’t slow you down, compact folded dimensions that fit your pack, stability systems designed for uneven terrain, and quick-release mechanisms that let you capture fleeting moments without delay. Models like the TT35 tripod demonstrate that you don’t have to sacrifice image quality for portability — carbon fiber construction, independently adjustable legs, and fast-deploying twist locks address the specific demands trail photographers face. For those who need even less weight, mini tripods and monopods offer targeted solutions depending on your shooting style and terrain.
Beyond choosing the right gear, how you use and maintain it determines whether your tripod remains a trusted tool or becomes a liability. Carry it close to your center of gravity, deploy legs wide before adjusting height, and clean locking mechanisms after every outing. Ultimately, the right choice depends on your camera system’s weight, the exposures you pursue, and the distances you cover. Use the criteria and comparisons in this guide to match a tripod to your specific adventures — then get out on the trail and put it to work.