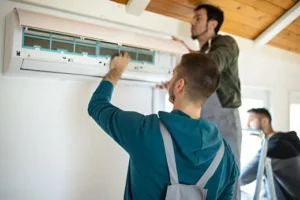
The concept of installing a garage water heater is intimidating for some. Still, its miles of sincere, do-it-yourself interest that can be beneficial and less expensive. A storage water heater will help you meet continuous hot water requirements efficiently. In addition, properly fitting the device is essential in maintaining it and its performance. For those not adept at such electrical and plumbing work, storage water heater installation services are available, and qualified technicians will install them correctly.
- Selecting the Correct Storage Water Heater
Finding the appropriate storage water heater comes first in the installation process. Decide how hot water will be used in the household to determine the capacity of the unit. A 30-50 gallon tank is considered enough for a small to medium-sized family, while larger households ought to require a larger length. If you do not know which model will suit your needs best, https://www.plumbersingapore.org/our-services/ offers professional plumbing services, including the installation of the most suitable water heater for your home,
- Turn off the Water and Power Supply
When you start the installation of your garage water heater, it’s essential to take precautions by turning off the water supply and the power supply before starting the setup. Here’s how:
- Turn off the primary waterdelivery to prevent unintended flooding, even when running.
- Shut off the strengthdelivery for electric-powered water warmers by turning off the circuit breaker.
- Turn off the gas supplyfor gas-powered heaters to avoid any threat of leaks or accidents.
- Get Rid of the Old Water Heater
If you are replacing an antique water heater, step one is doing away with the old unit. Step one might be to cut the bloodless and warm water pipes, which drain excess water from the tank to prevent you from spilling. If the unit is powered by electricity or gas, such connections must also be detached. When the old heater is finally removed, check whether the place is ideal for the new one.
- Installing the New Water Heater Tank
Ensure this unit rests on a level surface and is adequately connected in height with the water connections. The water lines should now be connected to both the inlet and the outlet valves on the new heater.
- Connecting Power or Gas Supply
Following the water heater in location, the subsequent system connects the delivery, be it fuel or strength. In the case of an electric water heater, connect the wiring according to the manufacturer’s information—ensure that the circuit breaker is the only one rated for the load. In the same way, if it is a gas water heater, connect the gas lines one at a time and make sure that no leakages are using a gas leak detector.
- Filling the Tank and Checking for Leaks
After fixing the water connections, the next step is filling the tank and looking for leaks. All the required steps to be followed are as follows:
- Turn on the water supplyand allow the tank to fill absolutely.
- Check all connectionsfor any symptoms of leaks across the water strains and valves.
- Tighteningany loose fittings is essential to save your water from leaking.
- Test the Heater
After filling the tank and ensuring no visible leaks, the next step is testing the heater. You must energize or connect the gas supply and raise the thermostat to the recommended range of 120-140°F. With the water gas heater, allow it some time to heat the water and check if the required temperature is achieved. If everything is operational, congratulations; your installation work is completed.
- Call Professional Installation Services
Although installing a storage water heater may be a do-it-yourself project, some require professionals. If you encounter various problems when managing electrical and gas fittings, you might be better off getting someone to do it. Experienced plumbers and technicians offer services that handle moving parts where complexities exist to avoid anything wrong.